100 Days of Powerbuilder – Day 4: A Look at the IDE
This is part of my project ‘100 Days of PowerBuilder’ which is a series of discussions focused on basic PowerBuilder development.
Note: This article is written with examples created in PowerBuilder version 12.5. Most steps/examples will be identical with any version going back to 9.
Mastering the PowerBuilder Integrated Development Environment (IDE) is the key to becoming a successful PB developer. As is normally the case with an IDE, there are many ways to accomplish the same task and each developer will create their own processes to do so. In this discussion we will go over some common configuration changes which should enhance productivity within the PB IDE.
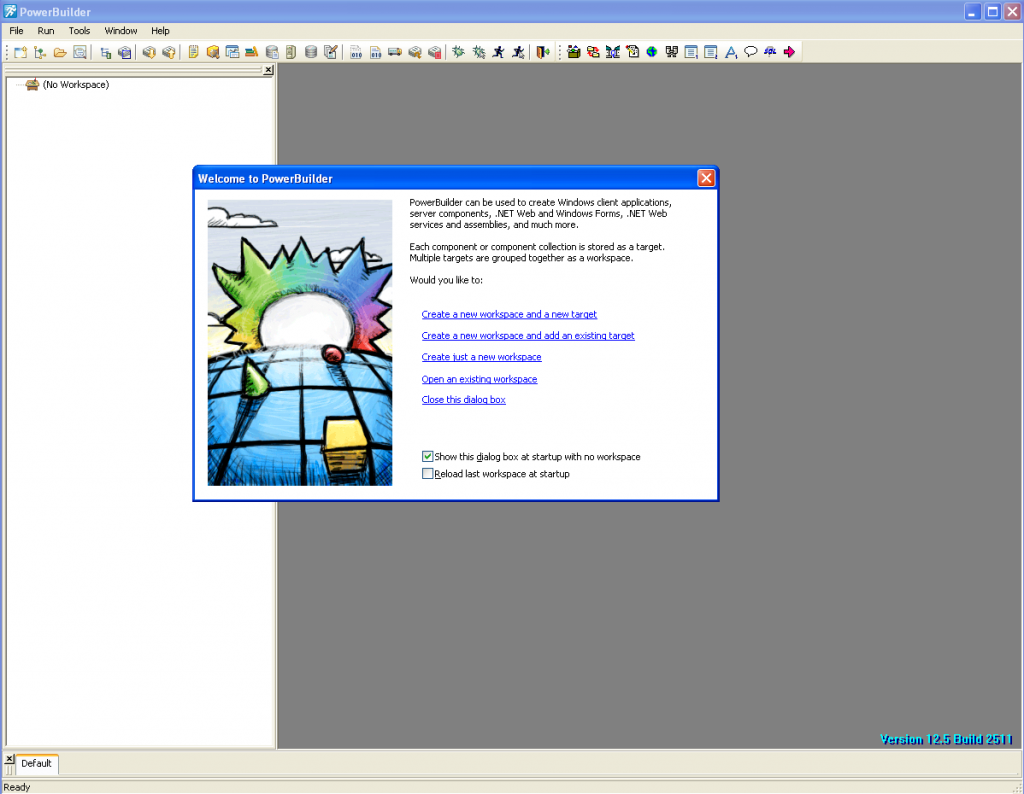
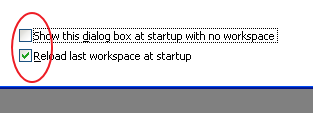
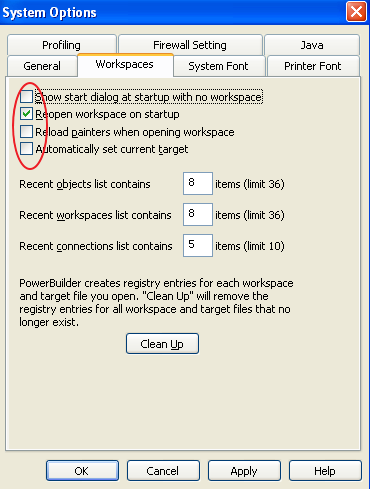
Here again is the standard screen normally presented after PowerBuilder is installed and run for the first few items. Now it’s time to banish this since we no longer need it. Select the ‘Reload last workspace…’ option and unselect the ‘Show this dialog…’ and then close the window.
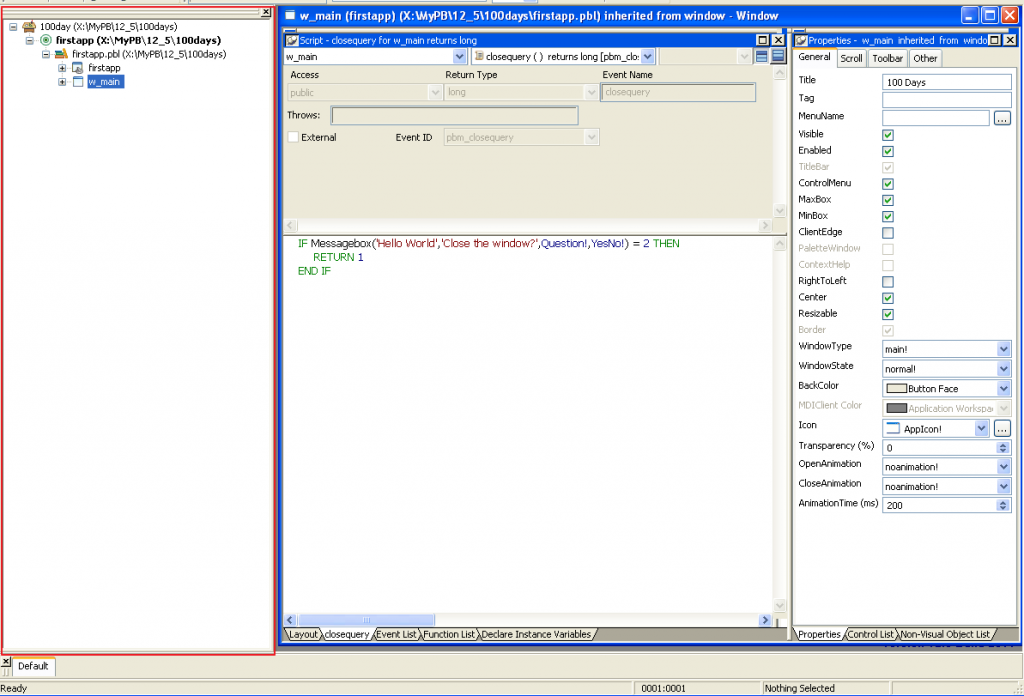
Now from here we have selected our ‘100day’ target and opened the ‘w_main’ object in the IDE. The treeview on the left is a nice navigational tool but it is always on top. Sure we can resize it or move it to another place but we still have the issue that it reduces the working area within the IDE. Close this frame altogether.
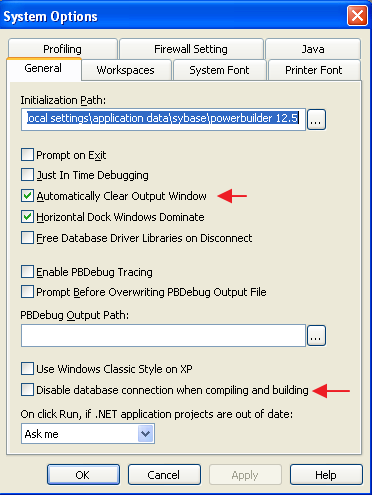
While we are at it, lets set up some system options to make things a bit more friendly.
Unselect the ‘Automatically Clear Output…’ option. This is especially important when searching through the code within the IDE. If you leave this option checked, previous search results are cleared; if you have a photographic memory then leave it checked. Select the ‘Disable database connection when compiling…’ option. This prevents the IDE from attempting to connect to the default database when performing a build (normally this is not important).
On the Workspaces tab you should have the ‘Reopen workspace…’ option checked.
Remember to click OK to save these changes.
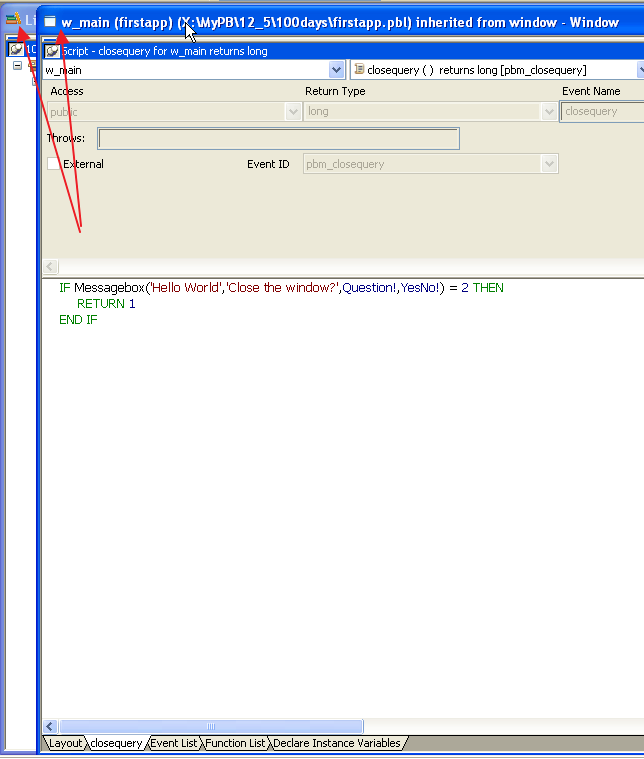
Getting back to the IDE we see that the working area is fairly large now and encompasses almost all of the space within the IDE. To view our workspace and the associated object we need to bring up the Library Painter. Choose the Library Icon from the toolbar. Notice that the object browser and the editor icons look very similar.
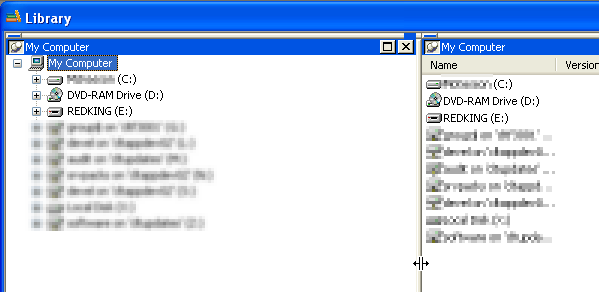
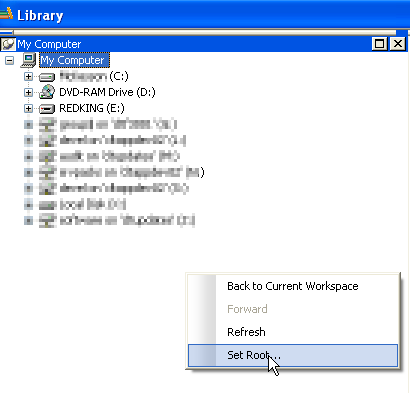
Notice the default location is My Computer which is of limited use. The library painter is very similar to the Explorer window in Windows. The left treeview is for navigation and the right is the detail. Right click on the treeview on the right.
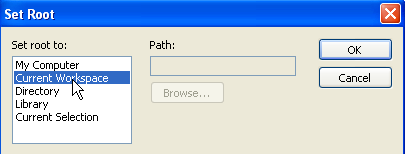
Choose the Set Root option and then ‘Current Workspace’
Now when you open the Library Painter you see the Workspace treeview to the left and the current object pane on the left.
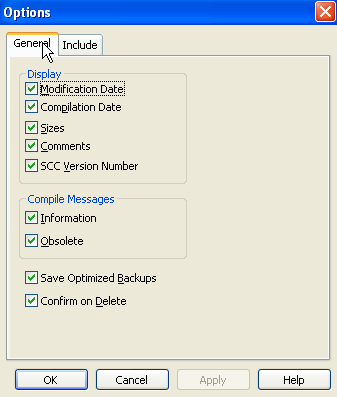
While in the Library Painter we can set some options, first on the General Tab
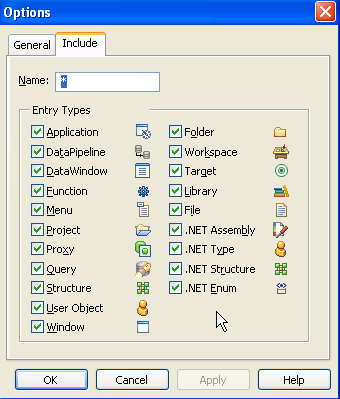
and then in the Include Tab.
I normally don’t make any changes here to the defaults.
Now when we click on an object to open it we see that the script painter opens much larger and is on top of the library painter.
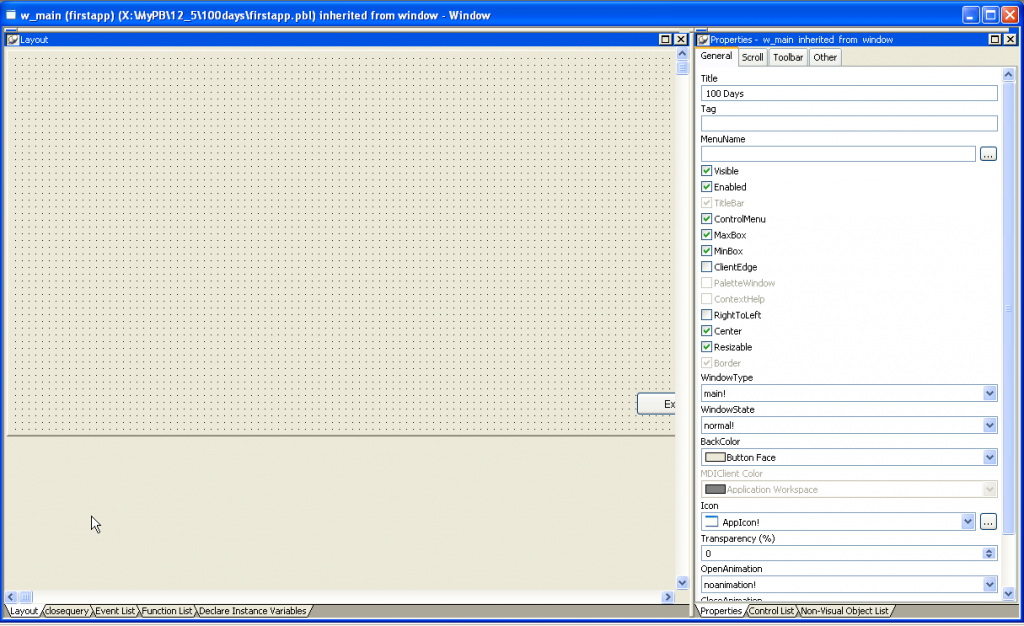
So if we take a closer look at the Script Painter for our window we have created we have the basic layout as shown.
Along the bottom of the ‘working area’ are a series of tabs.
These show the visual layout of the object, the current script (in our case the closequery event script), the list of Events, the list of Functions, and the Declare Instance Variables script.
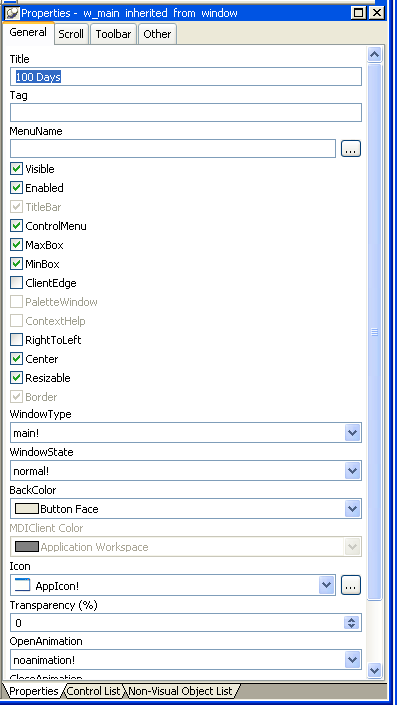
On the left side of the working area is the Properties pane.
Along the top are a series of tabs showing various propterties. These tabs (and properties) change based on the object selected in the Layout tab of the window or from the Control list (shown below).
Along the bottom of the Properties pane are tabs for the Properties, the Control List, and the Non-Visual Object List
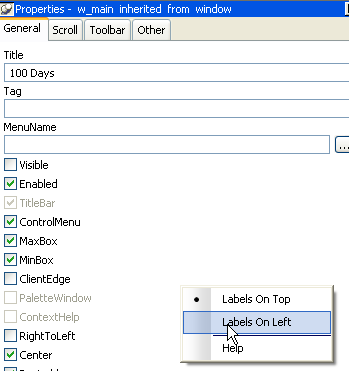
If you right click within the General properties area on the Properties tab you can change the layout of the tabs. The default is Labels on Top.
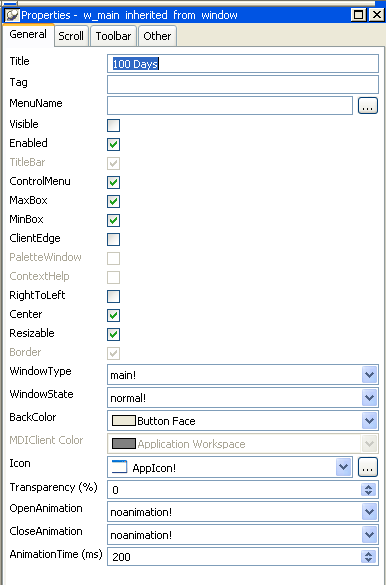
Here is the appearance when Labels On Left is chosen.
In this mode the information is shown in less space.
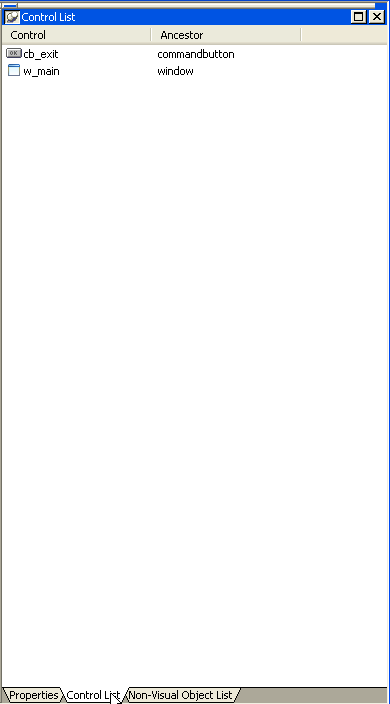
The Control List tab for our sample application looks like this.
You can select another control by clicking on it from the list. In this case we have two controls, the main window and the exit button.
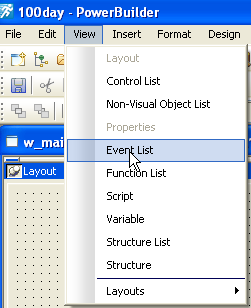
You can control the various panes shown in the script painter from the View menu option. Here we are choosing to have the Event List in its own pane.
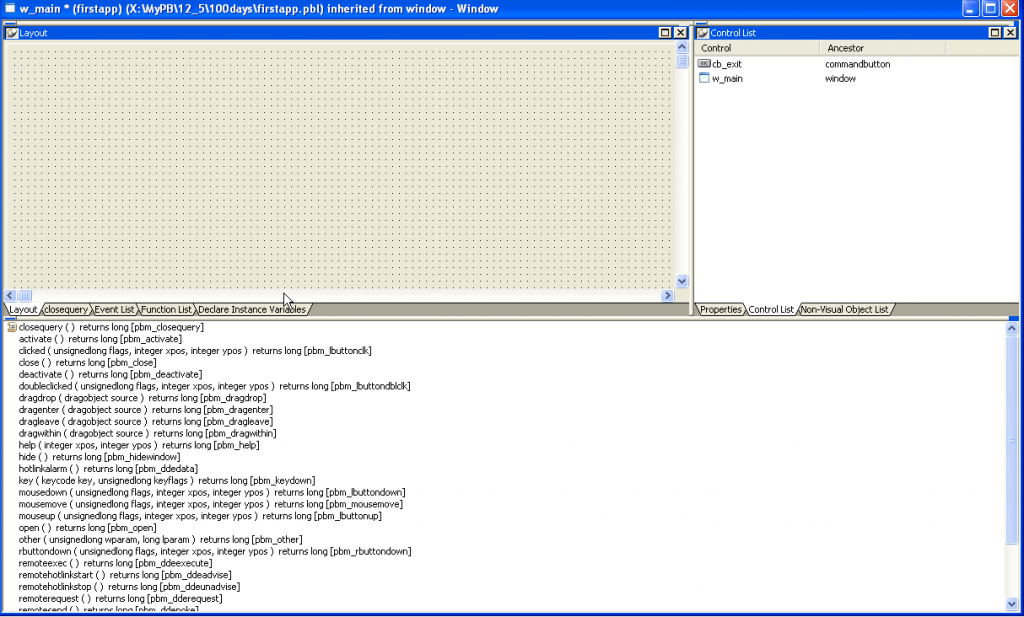
Since our system option is to have Horizontal Windows dominate the event list shows on the bottom. Not too helpful in my book.
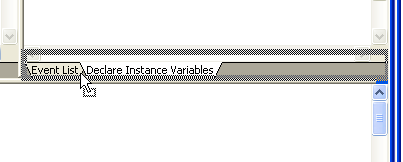
Move the pointer over the separation bar of the Event List and the title bar appears. From this point you can ‘pin’ the titlebar by clicking on the pushpin icon.
Drag on the titlebar with the pointer to change the location of this pane. Move it to the tab area below the Properties pane. You will see a shadow box appear indicating the location will recieve the dropped pane.
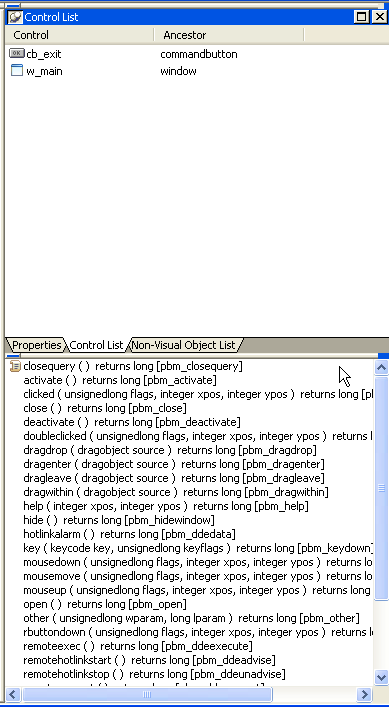
Now the Properties pane is ‘split’ into two with the newly dragged Event List on the bottom.
Do the same with the Function List so now you have both lists (as tabs) underneath the Properties pane. You can now experiment with changing the Properties pane width to give your script pane the most area possible.
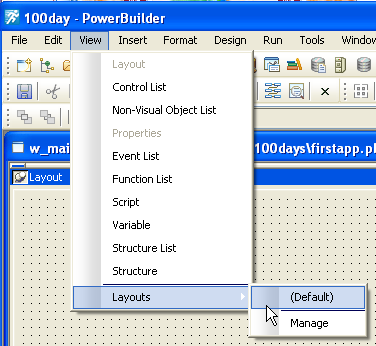
If you really screw things up or just want to start over, go to the View menu, choose Layouts and then (Default). You can also save layouts here once you come up with one or more you really like.







Leave a Reply