100 Days of PowerBuilder – Tutorial – Day 2: Creating a Main Application Window
This is part of my project ‘100 Days of PowerBuilder’ which is a series of discussions focused on basic PowerBuilder development.
Note: This article is written with examples created in PowerBuilder 2019 R3. The same steps would be pretty close with any version going back to 9.
For the purposes of this exercise I will be creating a Windows based application with a Single Document Interface (SDI). Later installments of the project will cover the other main interface type, MDI (Multiple Document Interface).
If you re-start PowerBuilder from the conclusion of our last session you will again be greeted with the ‘Welcome’ page.
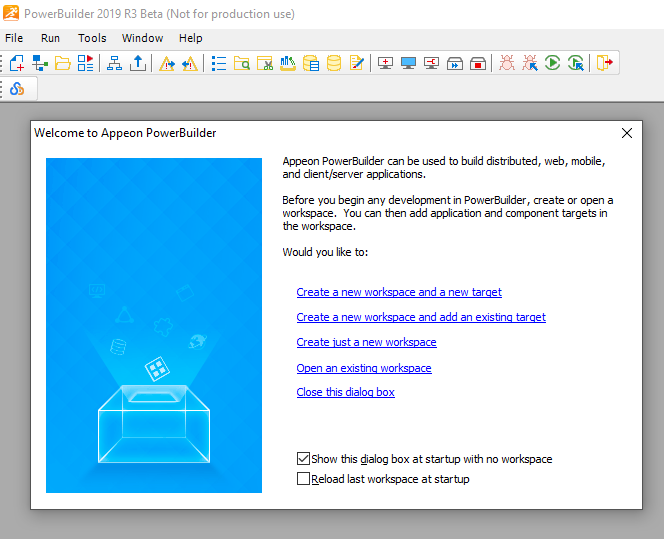
At this point you may wish to check the last checkbox, ‘Reload last workspace…’. This will have PB automatically begin each session with the previous session’s workspace open within the IDE. As time goes on you will probably uncheck the ‘Show this dialog box…’ option to dispense with the Welcome window altogether.
To add a ‘main’ window to the application choose ‘File – New’ which presents you with the following dialog window.

Select ‘Window’ and click ‘OK’. We will go over the other items in later sessions. By default the script window is opened for the new window (called ‘Untitled’ since it has just been created) in the ‘Open’ event. Lets set some of the window’s propreties right off the bat. Click on the Properties tab on the control list (lower left of screen).
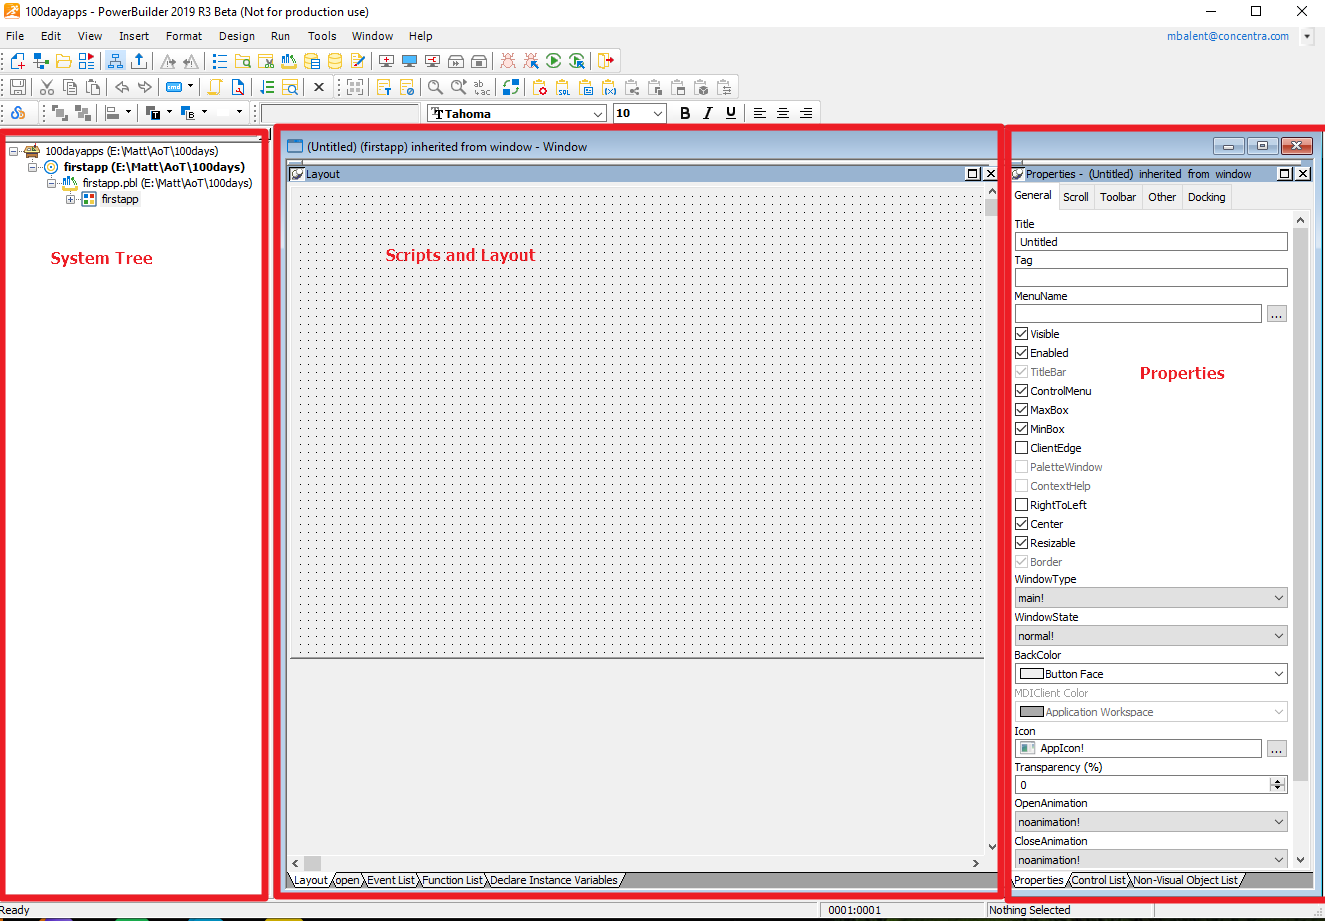
This window shows the entire PB IDE so lets take a quick overview. The top portion contains all the various menu bars, the left frame contains the system tree, the bottom frame contains the output (you can toggle these visible/invisible via the Window menu option), and the right frame is the current object editor (which includes the scripts and layout tabs) as well as the object properties frame.
The toolbars change depending upon which area of the IDE you are working in. To maximize the ‘working area’ (the area containing the scripts and layout) drag the toolbar sections from the third row up to the first two rows. See the start and end examples:


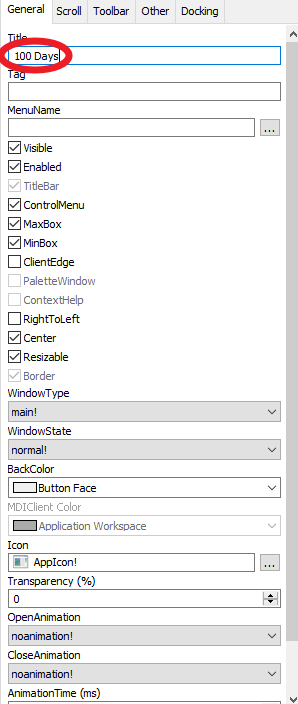
Okay, back to the window properties. Give the window a Title as shown below. All of the other defaults are fine for now
Now lets drop an object on the window to provide some basic functionality. In this case a button to close the window. Click on the Layout tab at the bottom of the IDE to display the window form. From the toolbar click on the small down arrow next to the Add Control icon.
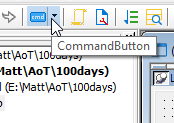
This brings up a subtoolbar with various controls you can place on the window. Choose (click) the command button option as shown then click on the toolbar icon to tell the IDE you are going to place a command button on some other control.
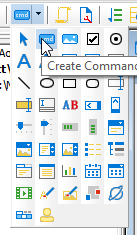
(Note about the add control icon, the icon on the IDE toolbar changes to the last control chosen so it will not always appear as a button.)
Click on the window form to place the command button. Once place the control is ‘selected’ allowing for resizing and repositioning as needed. Move the button to the lower right corner of the window frame.
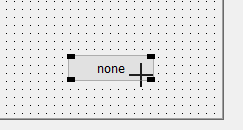
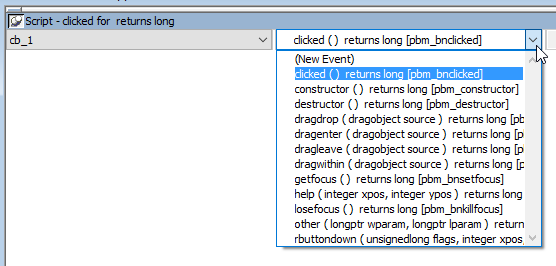
Note the properties section of IDE changes to those of the button just added. Change the Text from ‘none’ to ‘Exit’ since that is the function of the button. Right click on the button control and choose ‘Script’ from the menu. This takes you to the script portion of the control and, in the case of a command button, to the ‘clicked’ event. If you click on the down arrow in the Event list of the control, you see all of the system defined events for this type of control.
Remain in the clicked event script by clicking outside the dropdown. In the event script insert the following code:
close()
Okay, so what is this doing? Well, the button is used to trigger a method on the main window, in this case the Close function.
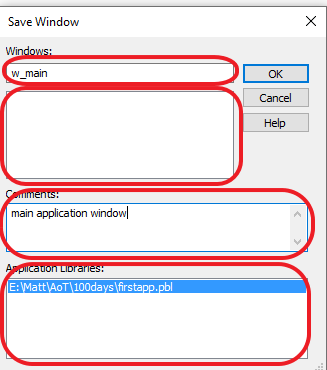
Now Save the window. This brings up the Save Window dialog.
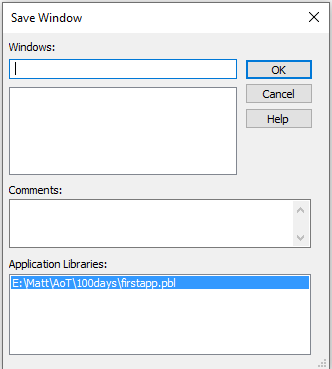
In this dialog we give the window a name (w_main), some comments, and select which library in our target we wish to save it in. Since we have only one library (PBL file) our choices are limited. Note the section below the window name. This area lists other objects in the currently selected library of the same type (in our case a window). Since this is the first window we are saving, the list is empty.
Now click the OK button.
Okay, something’s not correct.

The section below the event script has a message indicating an error. If there were multiple lines in the script above, you could click on the error messages and you would be taken to the incorrect line. In our case we are missing an argument to the function. To correct the error change the script to:
Close(Parent)
In this case the close method requires the name of the window it’s going to close. The pronoun ‘Parent’ is used to refer to the button’s containing control which is in this case a window. A window is the Parent of all of the controls which are directly placed upon it.
Now save the window. You will have to put in information in the window save dialog again in order to save it.
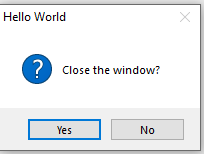
Now code the ‘Closequery’ event on the window. The button click will call the close function on the window. This function will first call the ‘closequery’ event and the ‘close’ event on the window. This allows for any preprocessing which may need to occur prior to the close of the window. Right click on the window, choose script, and then choose closequery from the dropdown. Insert the following code:
IF Messagebox(‘Hello World’,’Close the window?’, Question!, YesNo!) = 2 THEN
RETURN 1
END IF
This causes a messagebox window prompting a response from the user. The first string of the function is the messagebox title, the second is the message, the third is the icon, and the fourth is the choices the user has. Each choice returns a numerical value, in this case a 2 indicates the user pressed ‘No’. The closequery event can be used to prevent the close of the window by returning a value of 1.
The values “Question!” and “YesNo!” are enumerated datatypes specific to PowerScript and always end with an exclamation point.
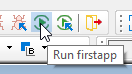
Save the window again and then click on the Run icon.
Now another message indicating something else is missing.
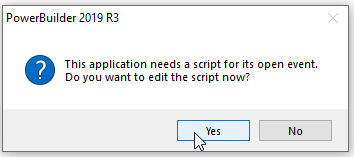
Click ok and add the following:
Open(w_main)

This tells the application to open the window object ‘w_main’ when the application launches.
Now save and run the application.

Click Exit.
Click Yes to exit the app.
![]()
Leave a Reply