100 Days of PowerBuilder – Day 5 – Building up the Application Structure
This is part of my project ‘100 Days of PowerBuilder’ which is a series of discussions focused on basic PowerBuilder development.
Note: This article is written with examples created in PowerBuilder version 12.5. Most steps/examples will be identical with any version going back to 9.
So lets get back to work on our sample application and enhance it’s functionality. Before we do this, lets get some organization to our project. The code created in PowerBuilder is stored in binary files called PowerBuilder Libraries which have the file extension of PBL. These are known as ‘pibbles’ (PBLs). All but the most elementary applications will have more than one of these files. In many instances you will use (or develop) one or more ancestor or framework level PBLs which make development easier, faster, more uniform in apperance and behavior, and (very important) to keep you from re-inventing the wheel over and over again.
In the halcyon days (PB 5 – 6.5) there were many strategies and best practices regarding the number of PBLs to have, how many objects they should contain, how to dynamically switch libraries to improve performance, and etc. Today many of the performance issues are no longer relevant due to OS and hardware improvements made since that time. Establishing a uniform structure to the contents of your PBLs which applies across the applications you develop is much more important in terms of lessening the learning curve for new developers and improving maintenance activities.
Most applications which are at least ten years old have a hodge-podge of PBLs loosely organized at best. Many may have had better structure but over time entropy took control, especially when the initial developers moved on to something else, and there was no longer anything other than individual discipline keeping things organized. The two types of sturctures I advocate are Object Centric and Module Centric.
The Object Centric model organizes libraries by object types. This gives a structure as follows
application.pbl
window.pbl
dataobject.pbl
service.pbl
business.pbl
ancestors
The Application PBL is generally very thin. By this I mean it has only a few objects. These include the Application object, a ‘Splash’ window, the MDI Frame (if its an MDI app), and maybe a specialized ‘About’ window. If the application is PFC based, the global ‘app manager’ object resides here too.
The Window PBL contains all the application specific windows.
The Dataobject PBL contains all the datawindow/datastore objects.
The Service PBL contains application specific functions, non visual objects, and application controls which do not provide business rule interaction. For example, say your application needs to know the date of the first business day after any given date and this type of calculation is needed in several places. You create a non visual object which contains all the code to do this (and any other date related stuff) and it would reside in this PBL. If you have a need to calculate Gross Margin based on various inputs you would place this in the Business PBL.
The Business PBL contains business rule objects. Processes like scrap calculations for materials processing, claims adjudication, inventory transaction processing, etc. go here.
Ancestor/Common object PBL(s) would go last and in whatever order is dictated by the framework.
Depending upon the circumstance, it may be benefitial to create separate PBL files for report dataobjects (if the application has a large number of them). Structures and Functions may be useful as well depending upon how may of these are used.
The point of this is to provide a simple ‘rule of thumb’ for any subsequent developers who have to maintain the application. It’s also easy to find common code across applications with this approach since you would generally be looking at the Service and Business PBLs.
The Module Centric model organizes libraries by application ‘sub units’. This gives a structure which might resemble this.
application.pbl
module1.pbl
module2.pbl
setups.pbl
common.pbl
ancestors
The Application PBL is also pretty thin. It contains the application object, the main window, the ‘About’ window, maybe a global transaction or app manager object.
The Module# PBLs are determined by major functionality groups within the application. Examples would be ‘order entry’, ‘scheduling’, ‘payables’, etc. Within each PBL are all, or most, of the objects needed for that functionality group.
The Setups PBL is really a specialized module which groups all the ‘Maintenance’ type activities required for the other modules. These would include code or definition creation/maintenance, rules engine setup, data imports, etc.
The Common PBL contains items needed across multiple modules or applications. These objects could include a base code search window, financial calculations, a dashboard ancestor, etc.
The Ancestor PBL(s) again go last.
This type of structure captures common functionality within the PBL allowing for easier sharing amongst applications. If even a small subset of windows is needed somewhere else, you would only have to include a single PBL in the other application library list. This structure has a more ‘organic’ feel to it and can become very confusing if growth is not managed.
Common Considerations
The PBL files themselves should be named so there are no duplicates amongst all the applications. Generally an application designator is used, e.g., abc_app.pbl, abc_window.pbl, or abc_setups.pbl.
Each PBL should reside in its own folder. This is very important for source control reasons. Name the folder the same as the name of the pbl, i.e., ‘abc_app’ contains the ‘abc_app.pbl’.
Often you will not really know how large a set of objects you will have when you start building an application. This makes setting a limit to the number of objects a PBL contains difficult. If you start to exceed 100 or so objects you might want to create a second library.
What You Don’t Want
MB_MODS9_17.PBL
MB_MODS9_30.PBL
MB_MODS.PBL
WIN95NT.PBL
MAIN.PBL
CEMAIN.PBL
ULSUPPORT.PBL
ULDW.PBL
ULDW2.PBL
MIKE.PBL
PFC.PBL
PURCHASE.PBL
ULDW_2.PBL
OBSOLETE.PBL
ANCMAIN.PBL…
Have fun with this one…
Creating and Adding a Library
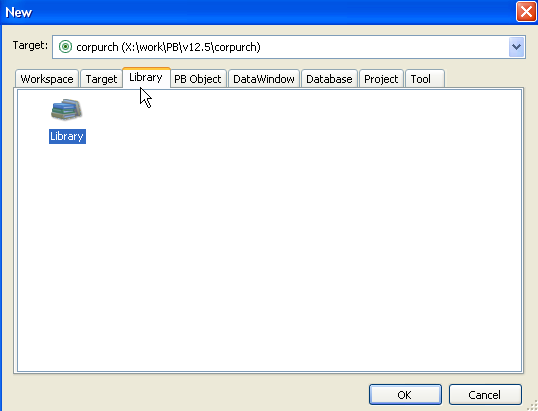
Go to File – New – Select the Library Tab, then OK
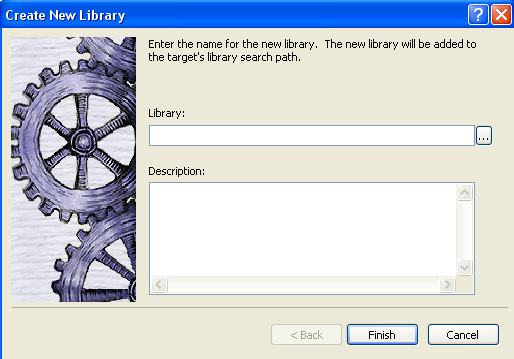
Click on the Elipsis to open the File Dialog window
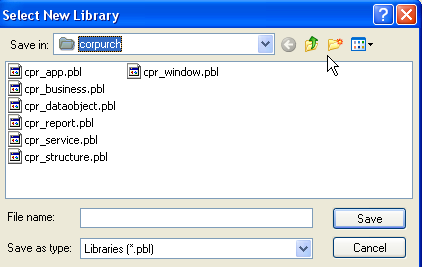
Navigate to the appropriate location to hold the new file, create the folder, name the file, then Save
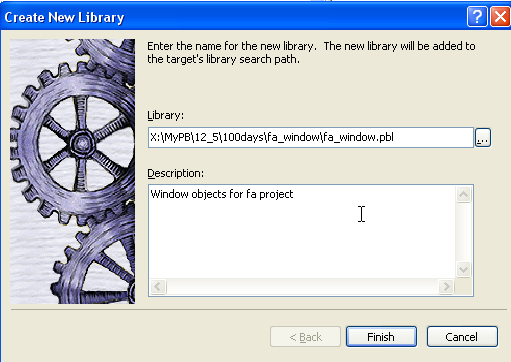
Give the new library a description then click Finish.
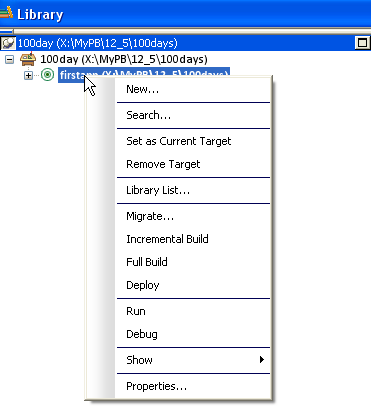
Go to the Library Painter, right click on the Target then choose Properties
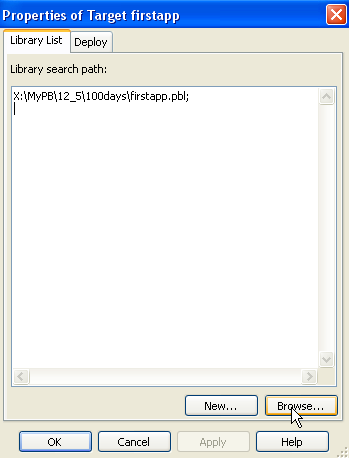
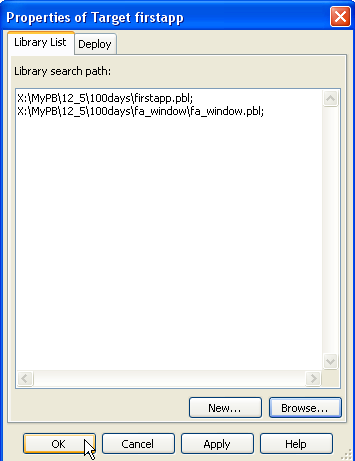
Click on Browse. Note you can create the Library file from this window via the ‘New’ button. Navigate to the location of the new library, select it, then OK.
Now the library has been added to the application. Click OK
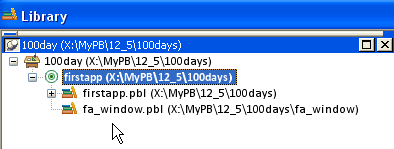
The new library appears in the Library Treeview.

Leave a Reply